

Description
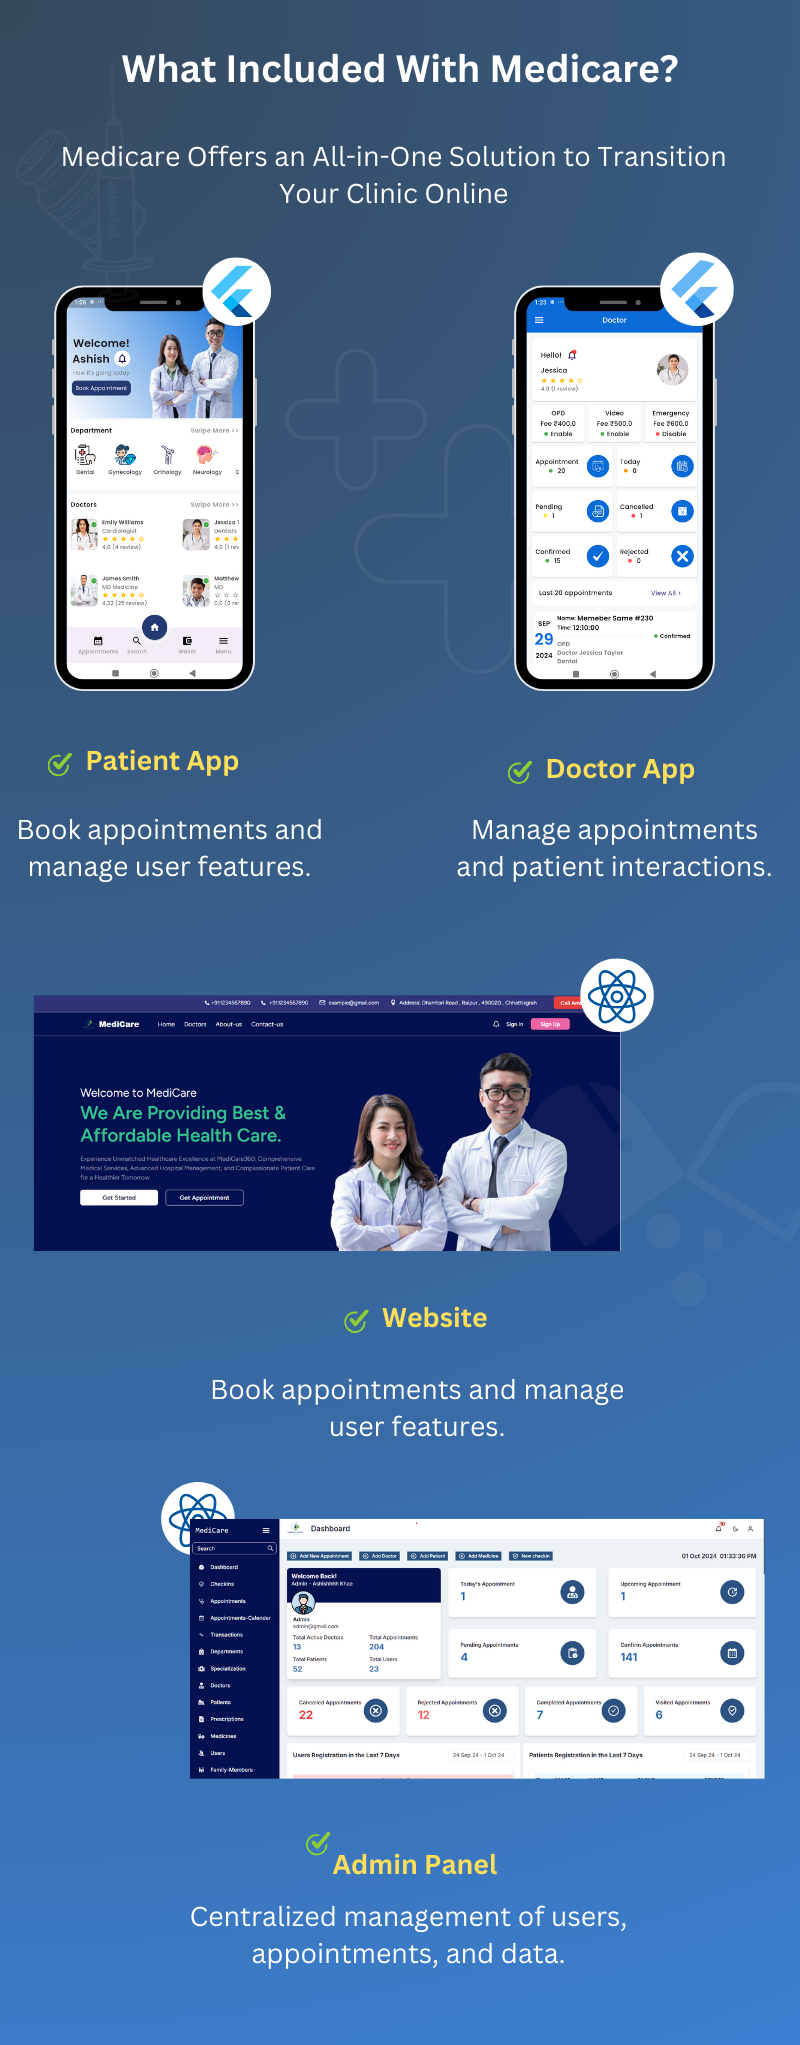
Transform your healthcare business with Medicare – a complete Hospital & Clinic
Management System built for modern, multi-city and multi-clinic operations. Medicare
is a powerful all-in-one solution featuring an Admin Panel, User App, Doctor App, and
User Website, designed to simplify appointment booking, doctor scheduling, queue
management, and patient check-ins. Integrated support for multiple payment gateways
such as Razorpay, Stripe, and more ensures smooth and secure transactions.
With advanced modules for patient management, pathology & lab bookings, test reports,
prescriptions (manual and handwritten-style), invoices, payments, transactions, and
multi-calendar views, Medicare enables hospitals, clinics, and diagnostic labs to operate
efficiently from a single platform. The system also supports multi-doctor scheduling,
services management, lab tests, file uploads, coupons, banners, blogs, reviews &
testimonials, and multi-language functionality — making it highly scalable for clinics
of any size.
The newly added Patient Subscription Plan Module allows Super Admin and Clinics to
create and manage service-based plans that patients can purchase directly from the mobile
app or website and use at the time of booking. Plans support special service types
including OPD Video Consultation and Emergency, giving patients seamless access to
priority care. Patients can track their usage, remaining sessions, plan status, and active
days — all from the app. Clinics can also apply patient plans at the time of appointment
booking and generate invoices accordingly.
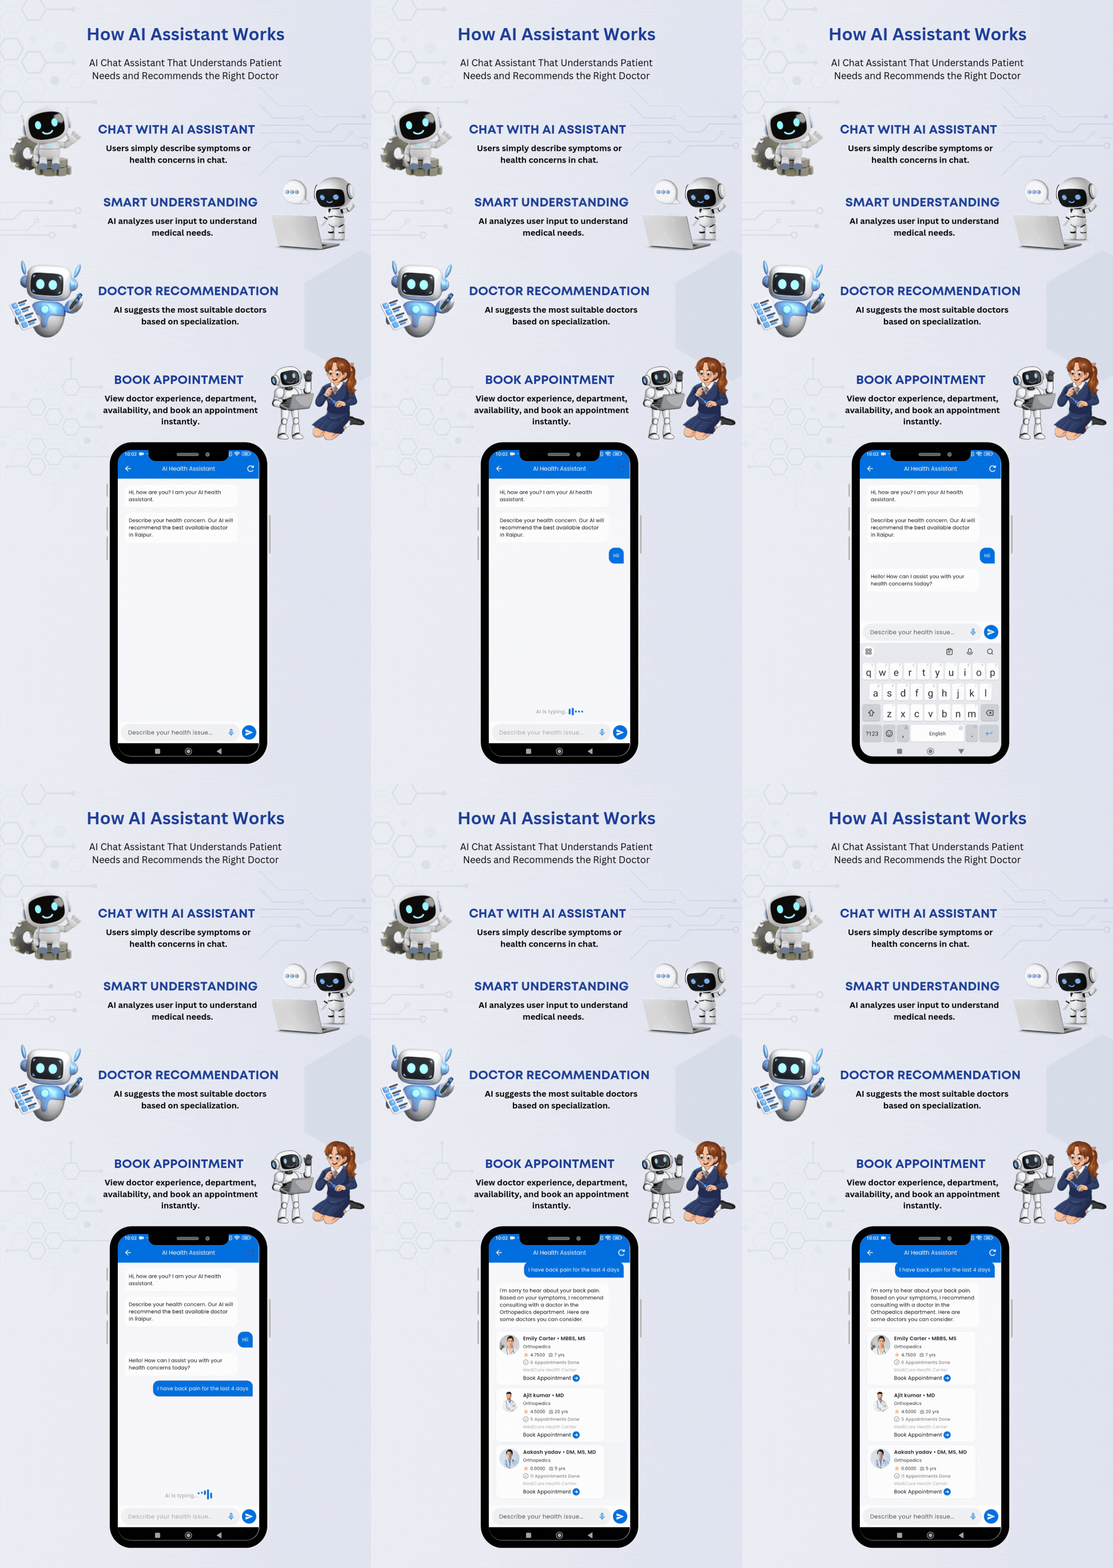
What sets Medicare apart is its AI-powered health assistant, which intelligently
recommends doctors through chat, helping patients find the right specialist instantly.
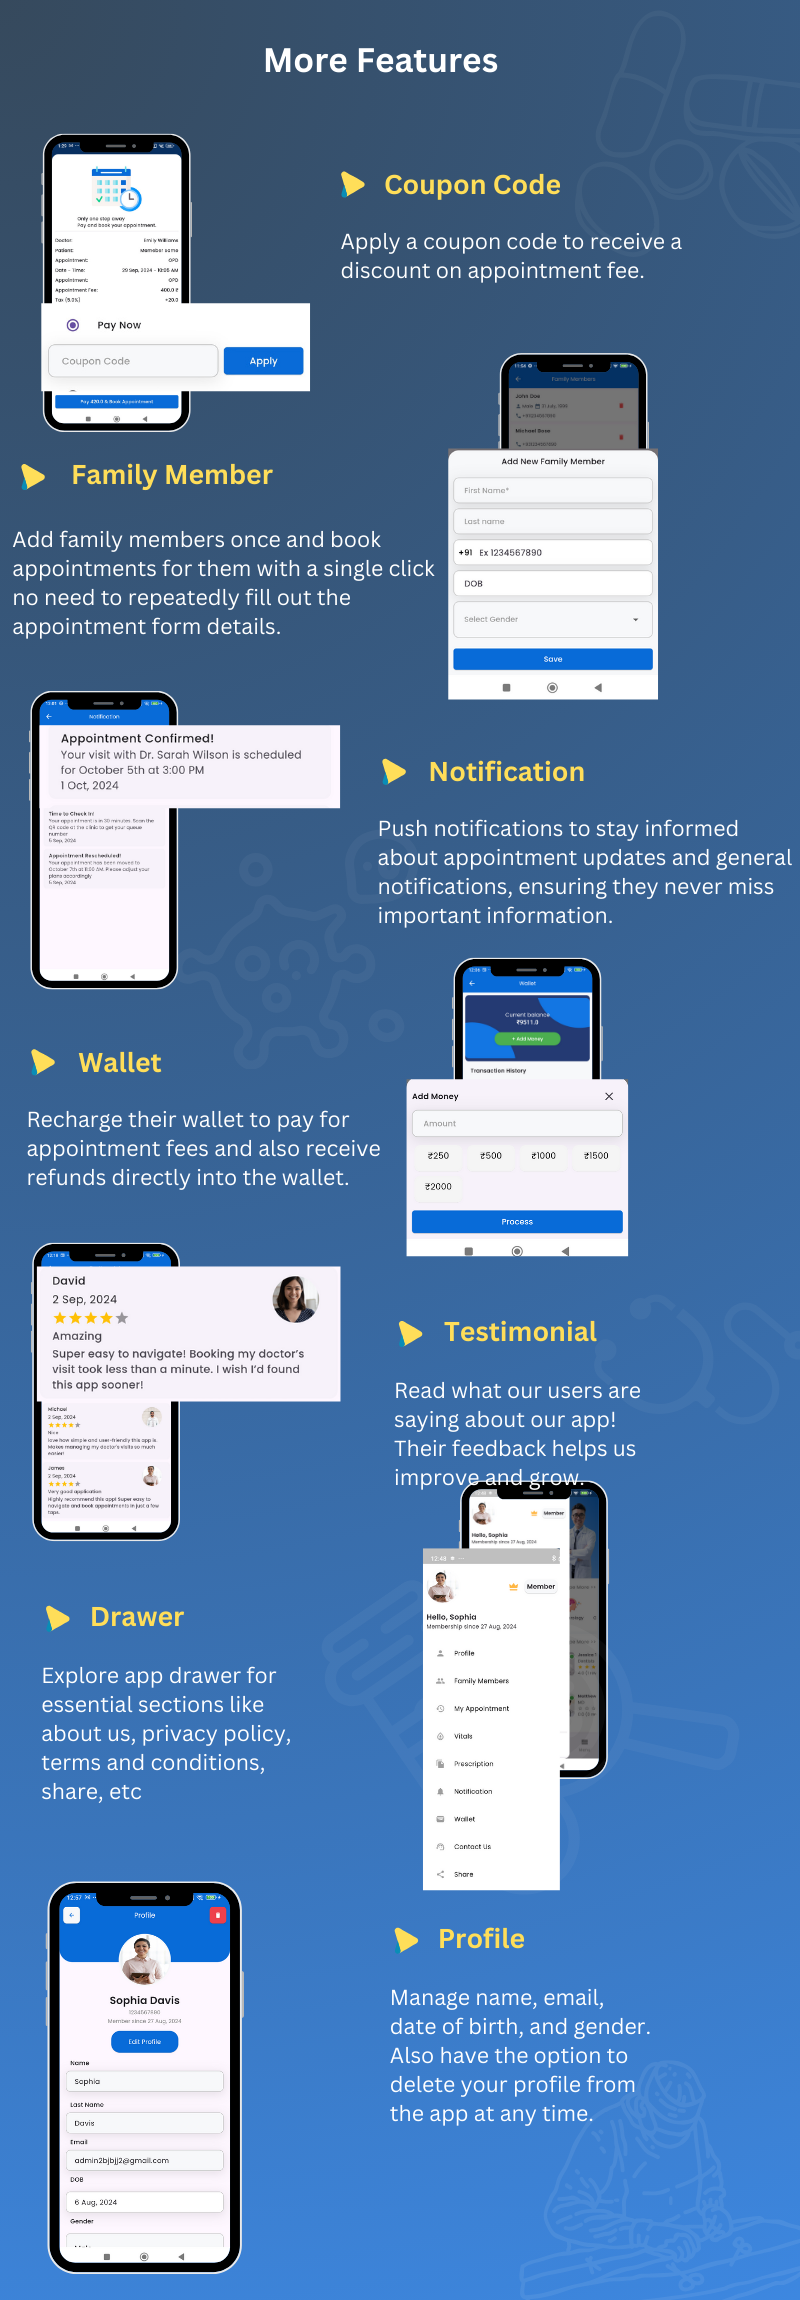
An automated reminder and notification system sends same-day and one-hour-before alerts
for appointments and lab bookings, along with daily summaries for doctors, pathology labs,
and admins. Role-based access and permissions keep data secure. Ideal for telemedicine
platforms, large hospitals, and growing clinics, Medicare also includes real-time
analytics, video consultations, custom branding options, lifetime updates, and premium
support — making it one of the most complete healthcare management solutions available
on CodeCanyon.

 |
 |
 |
 |


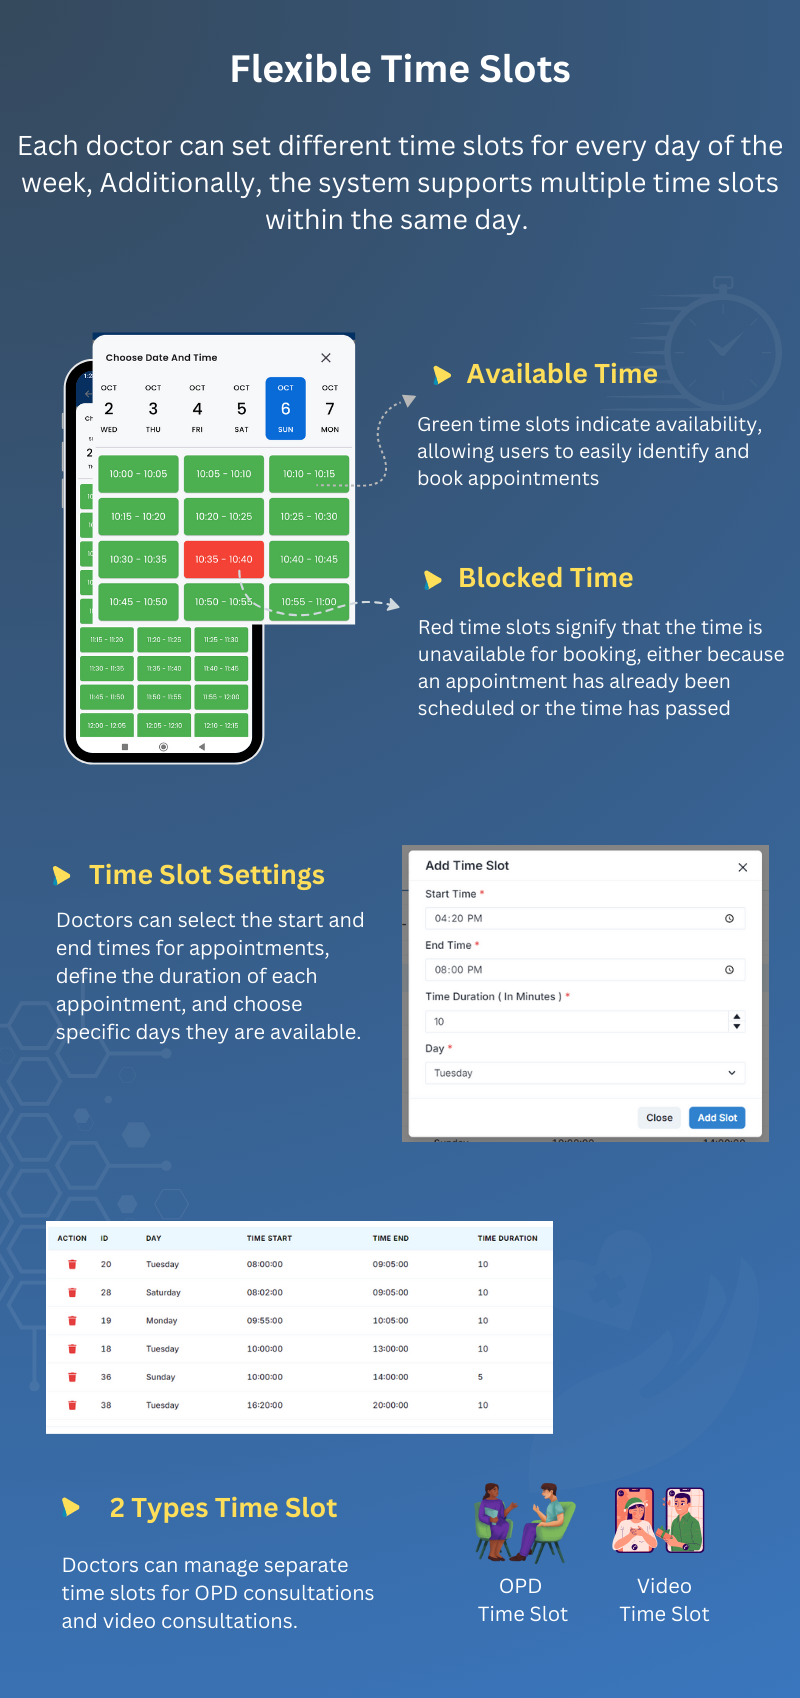
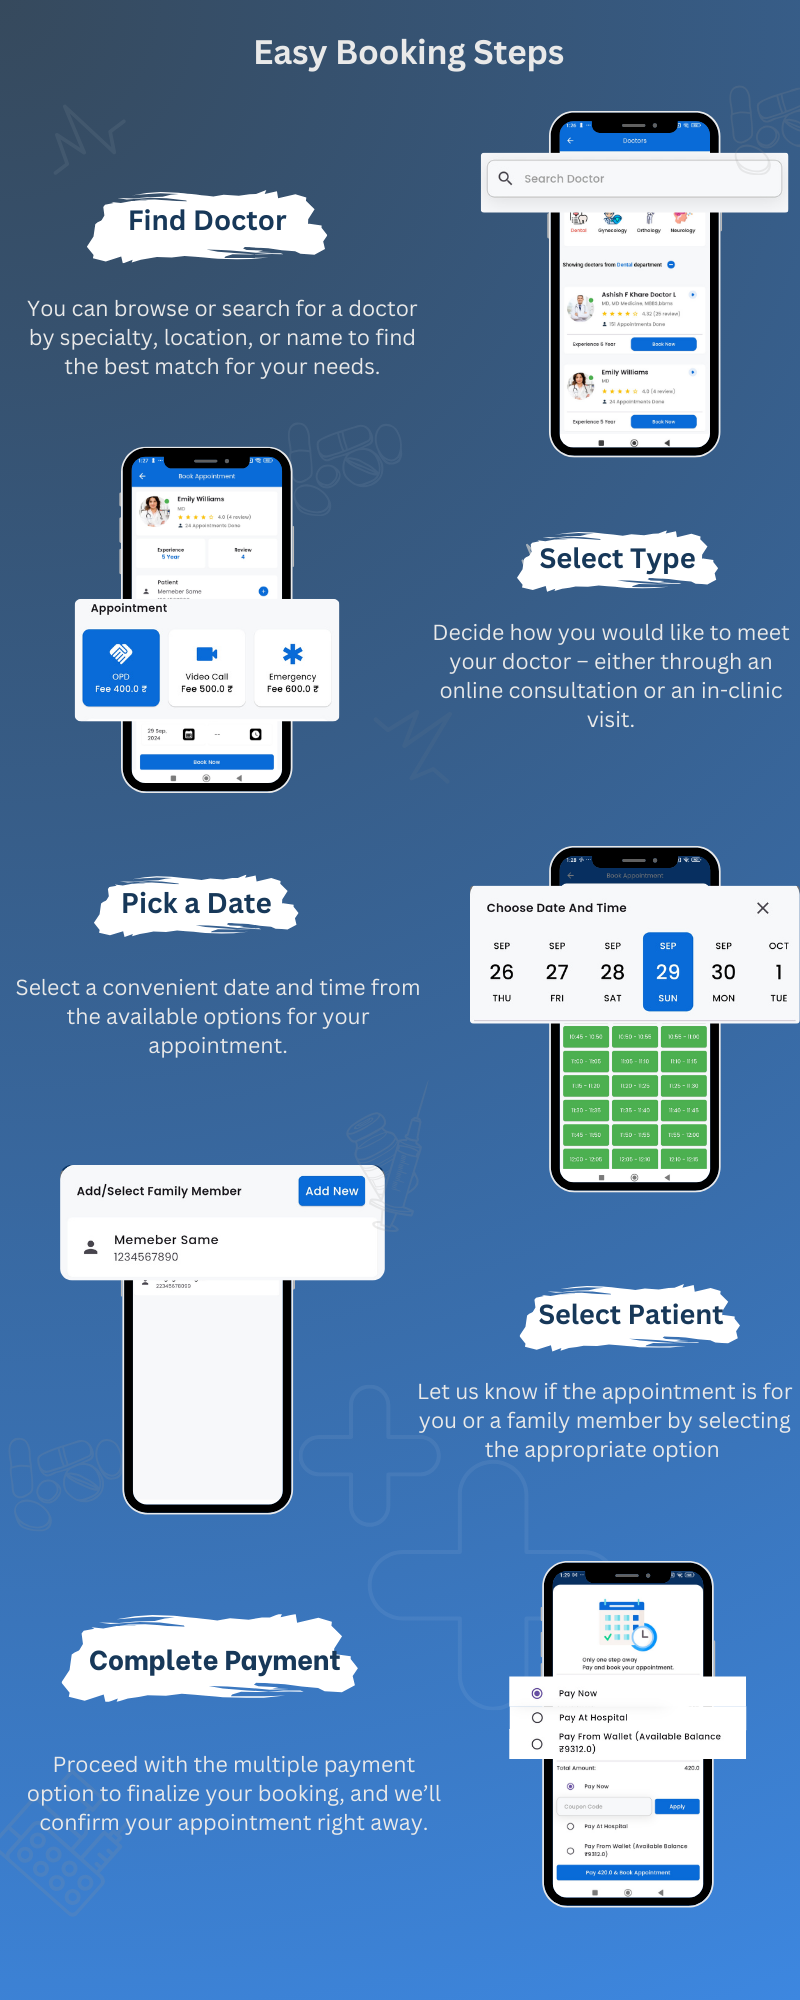
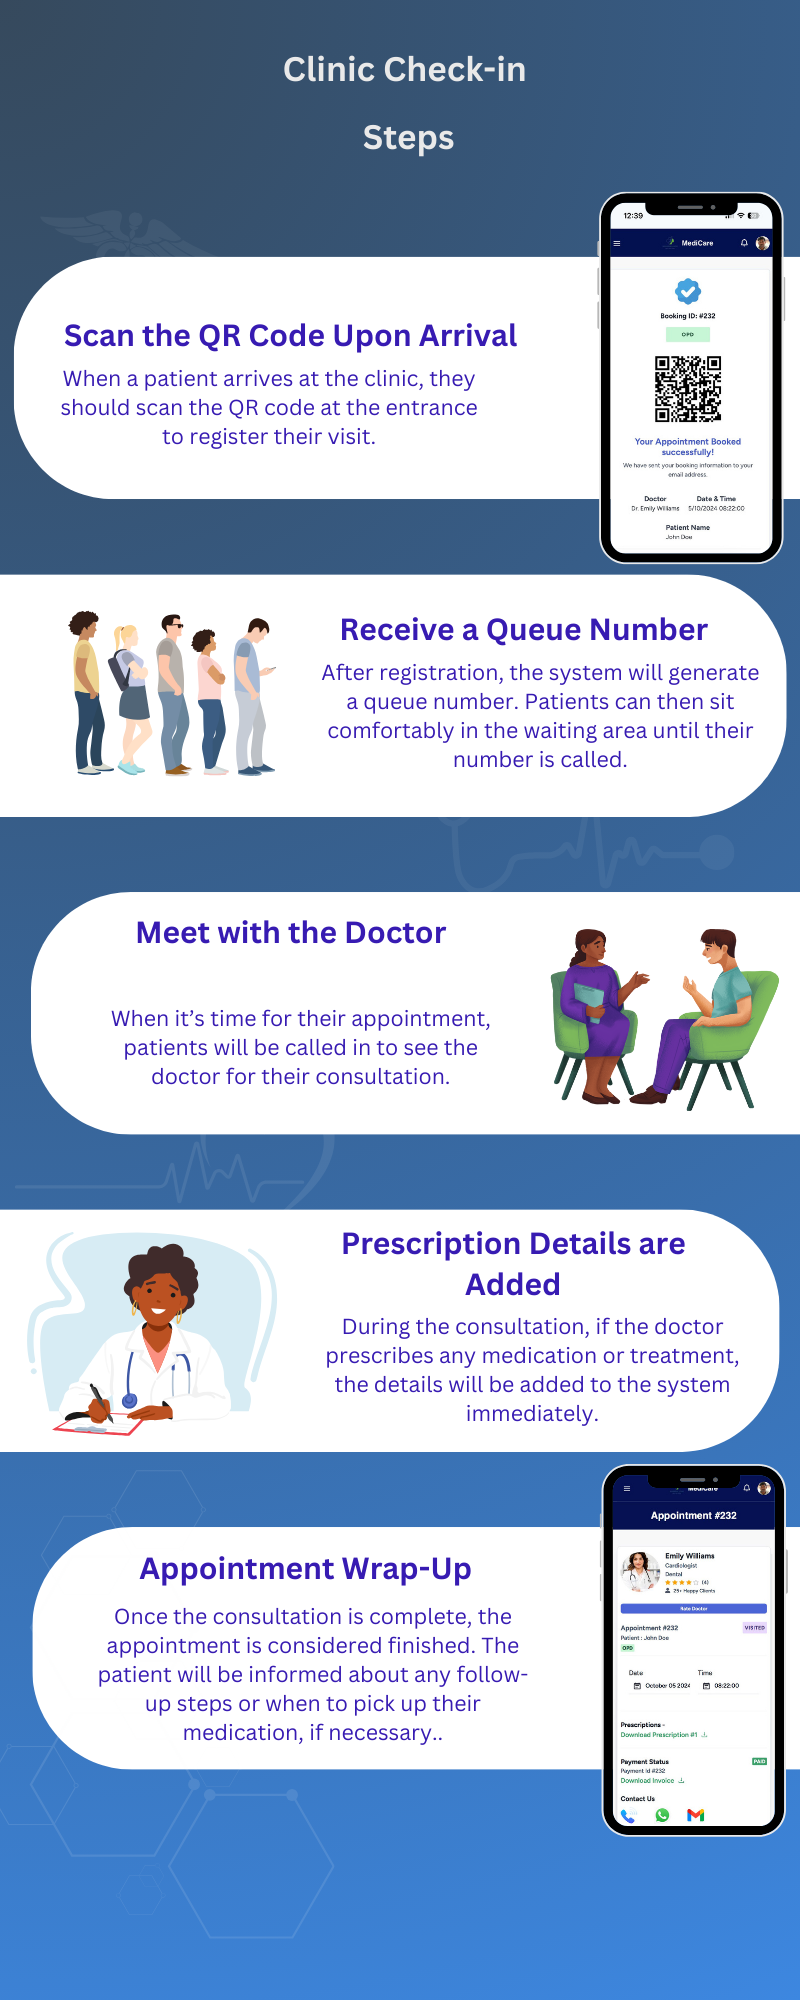
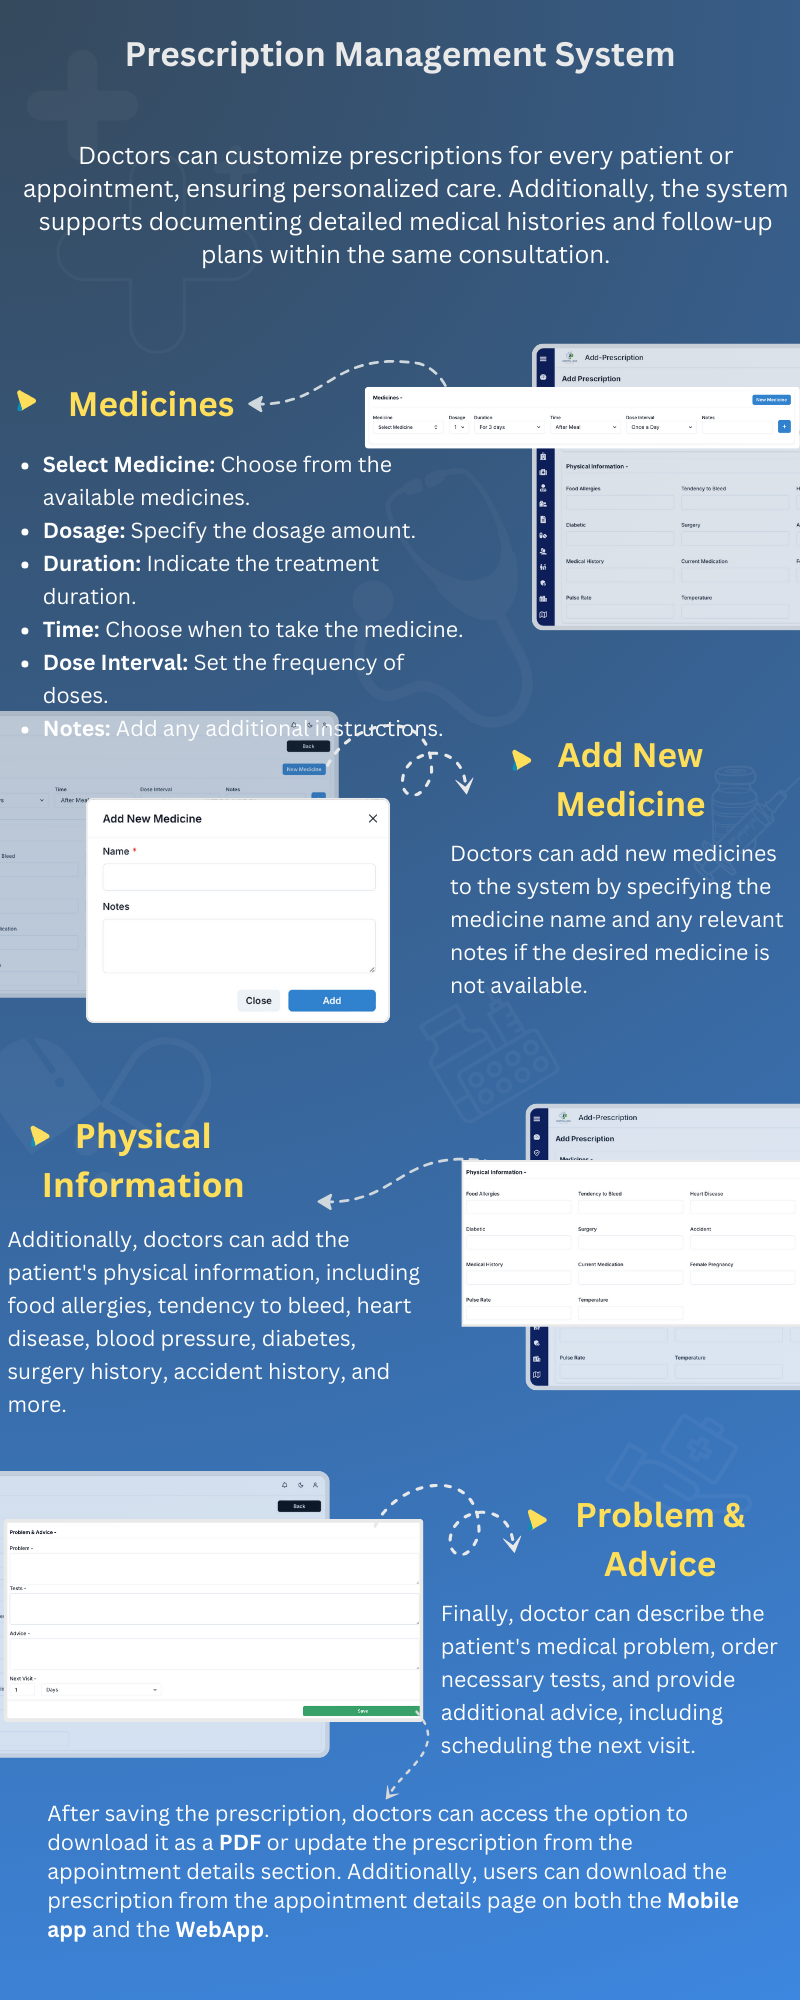
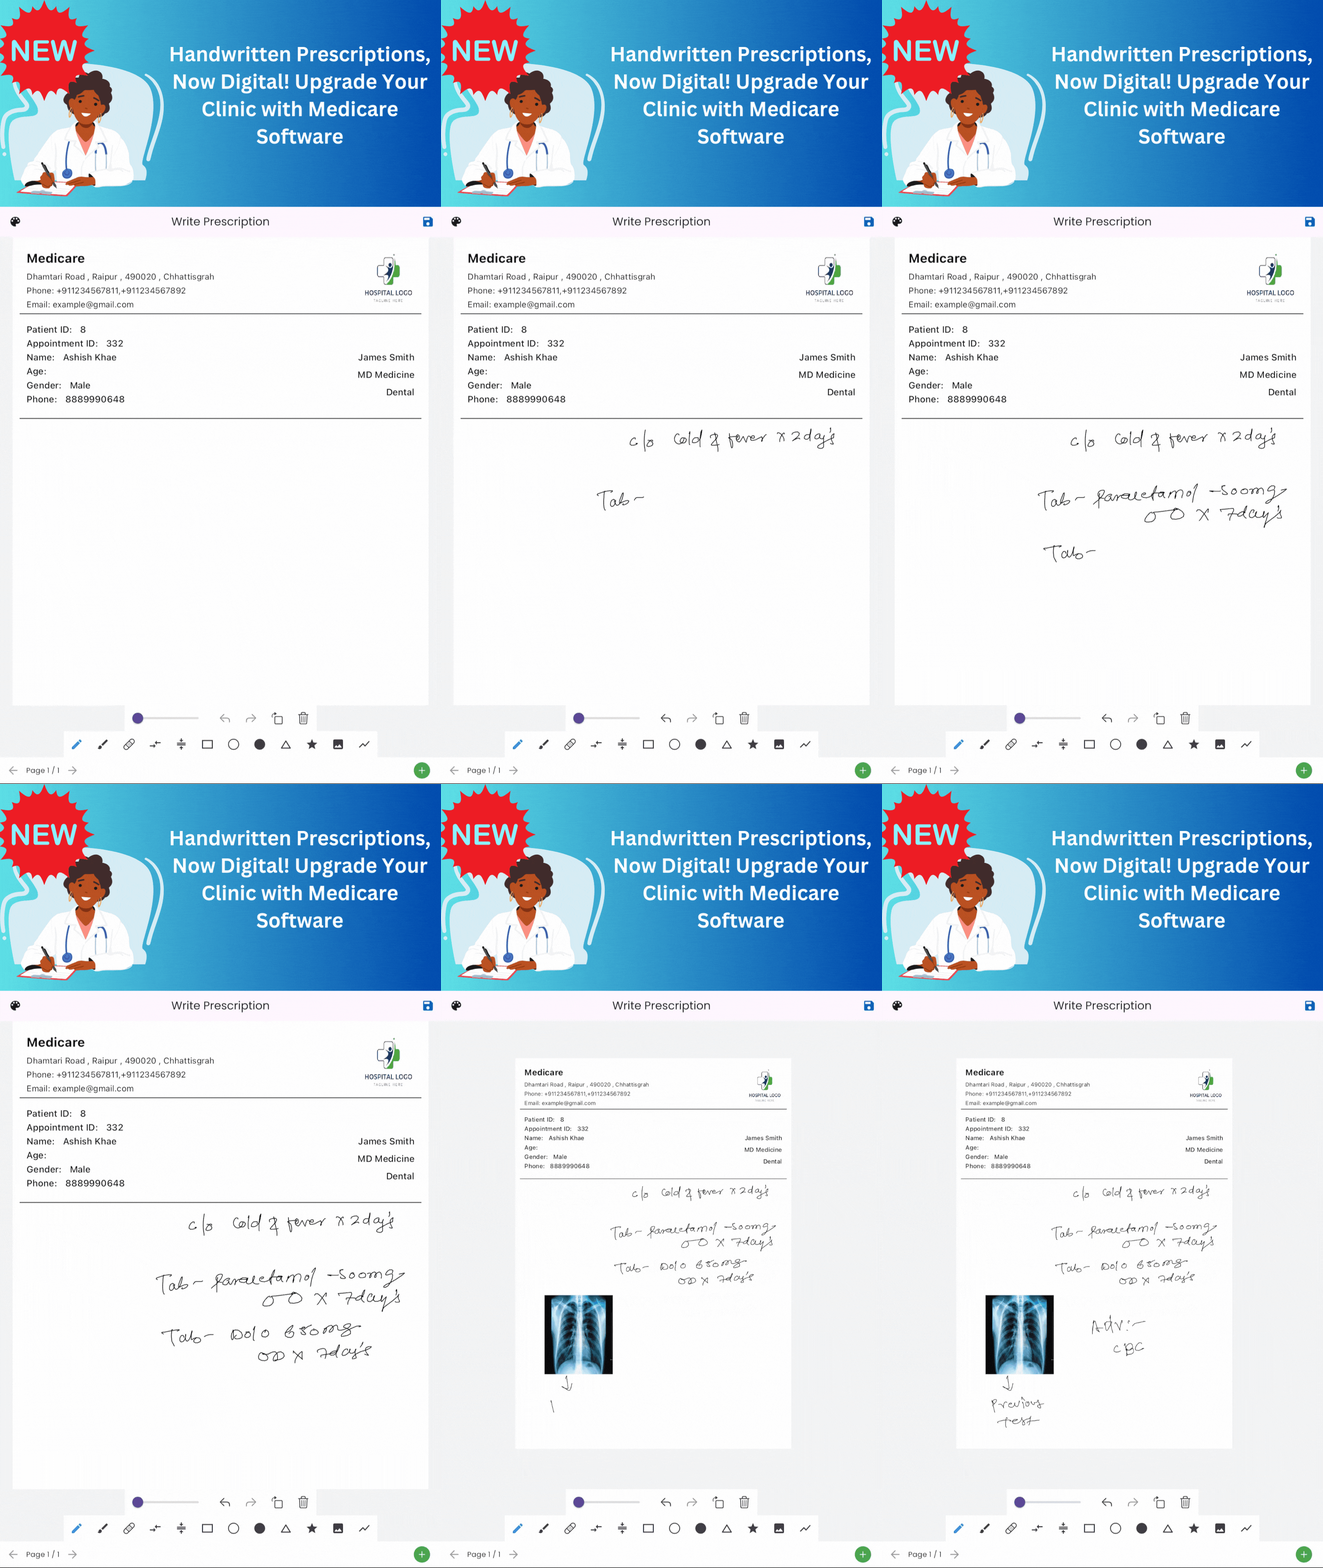

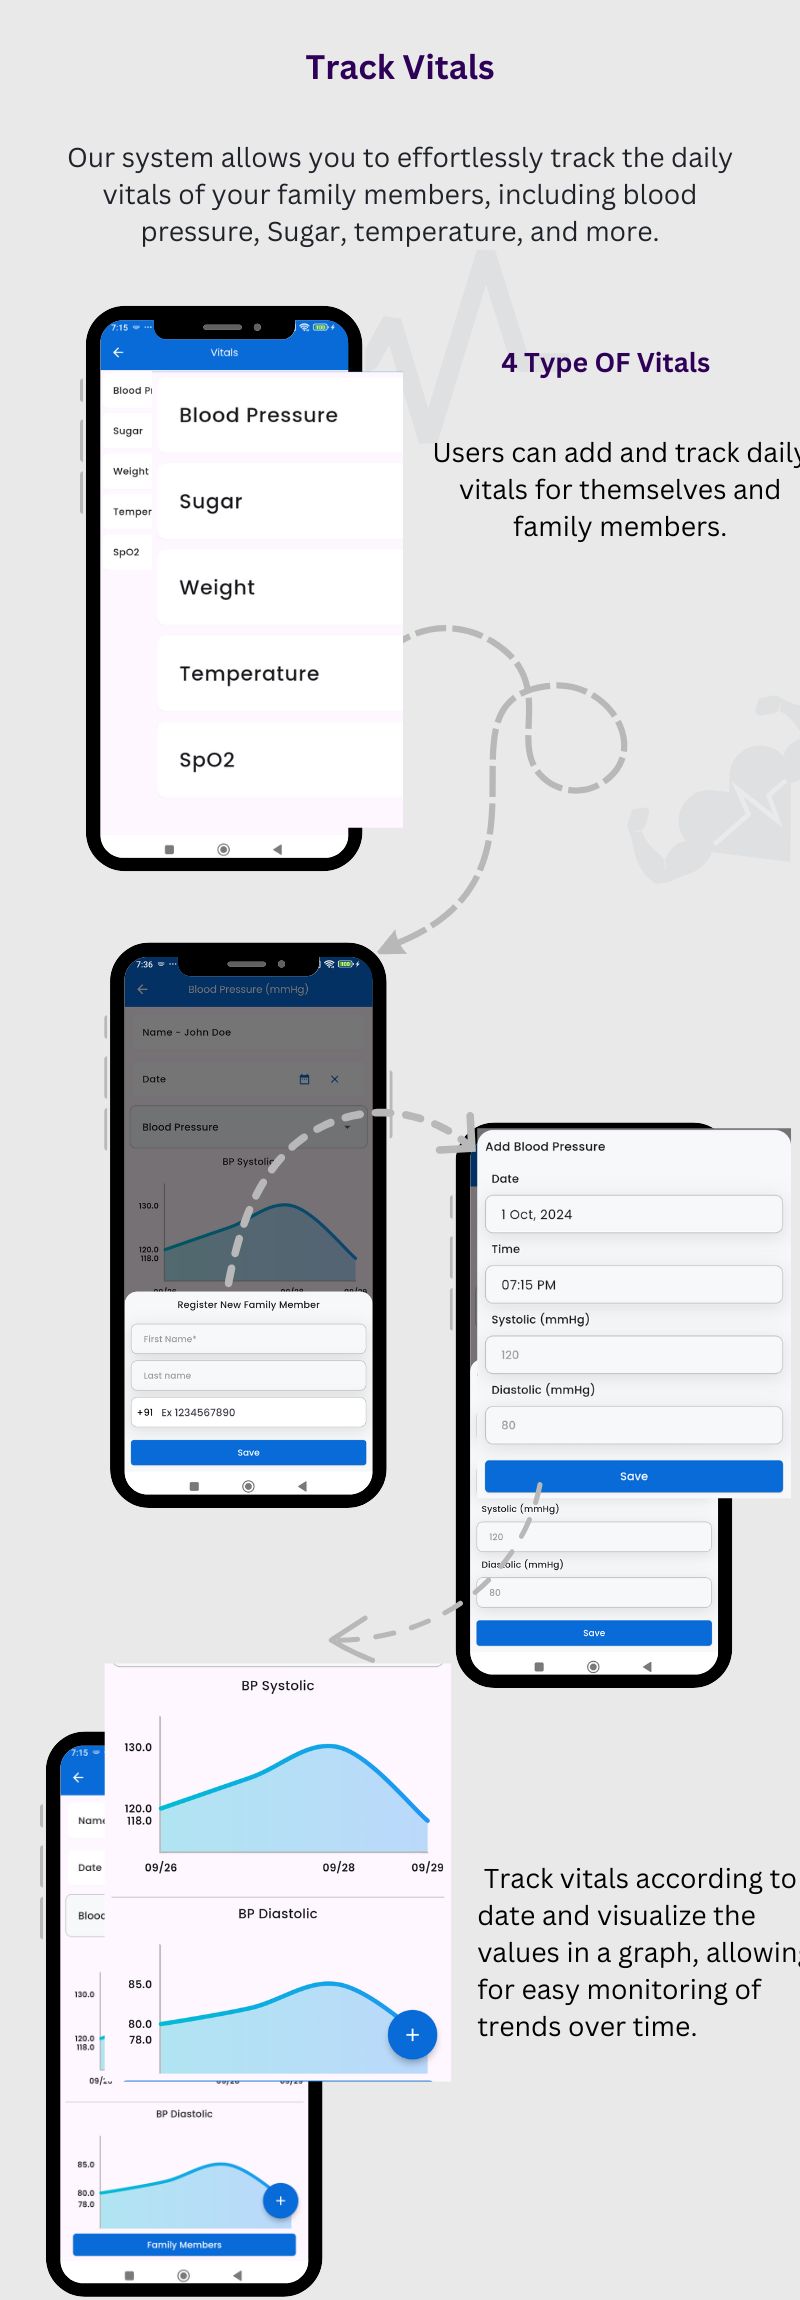
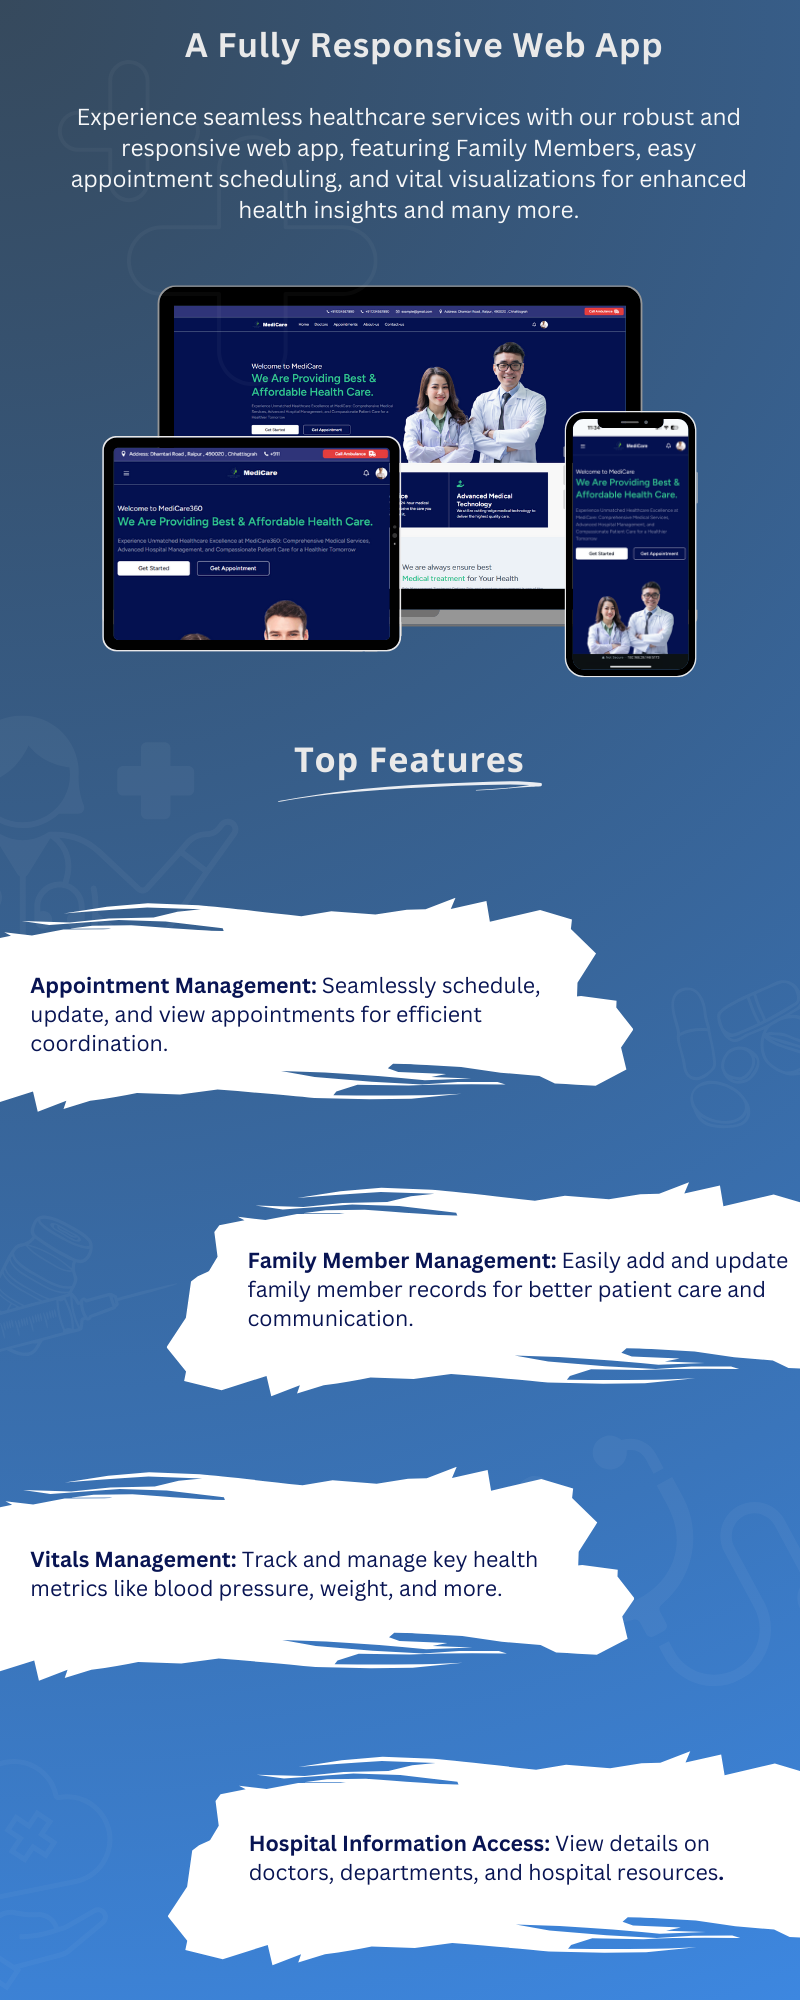
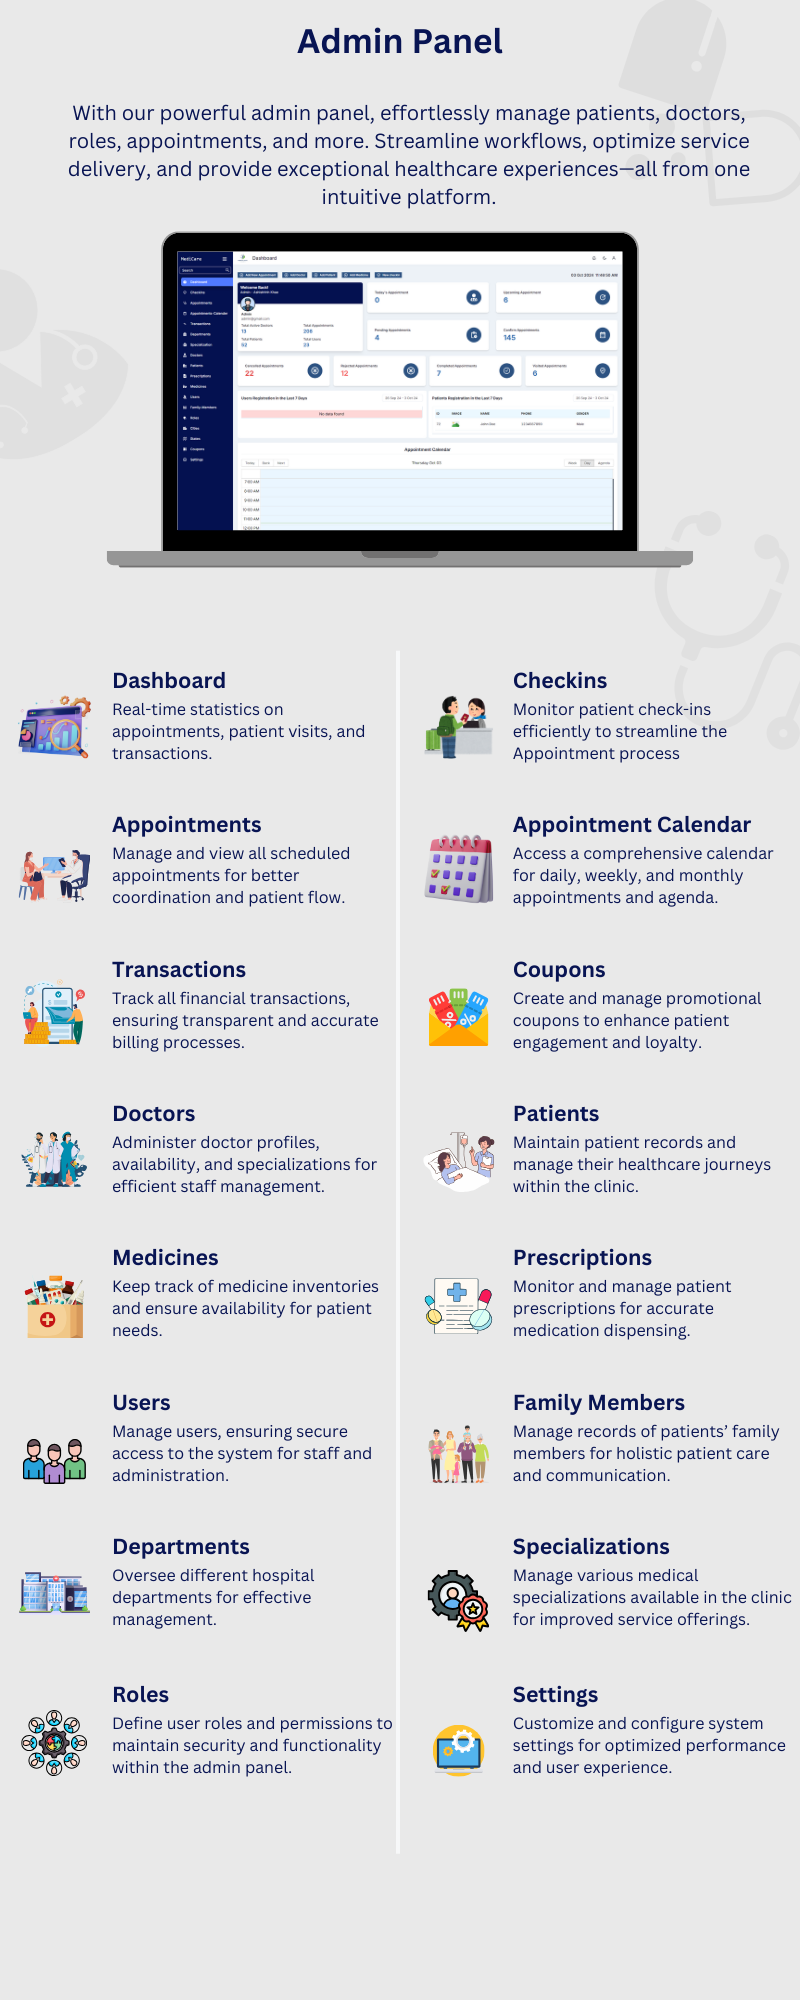
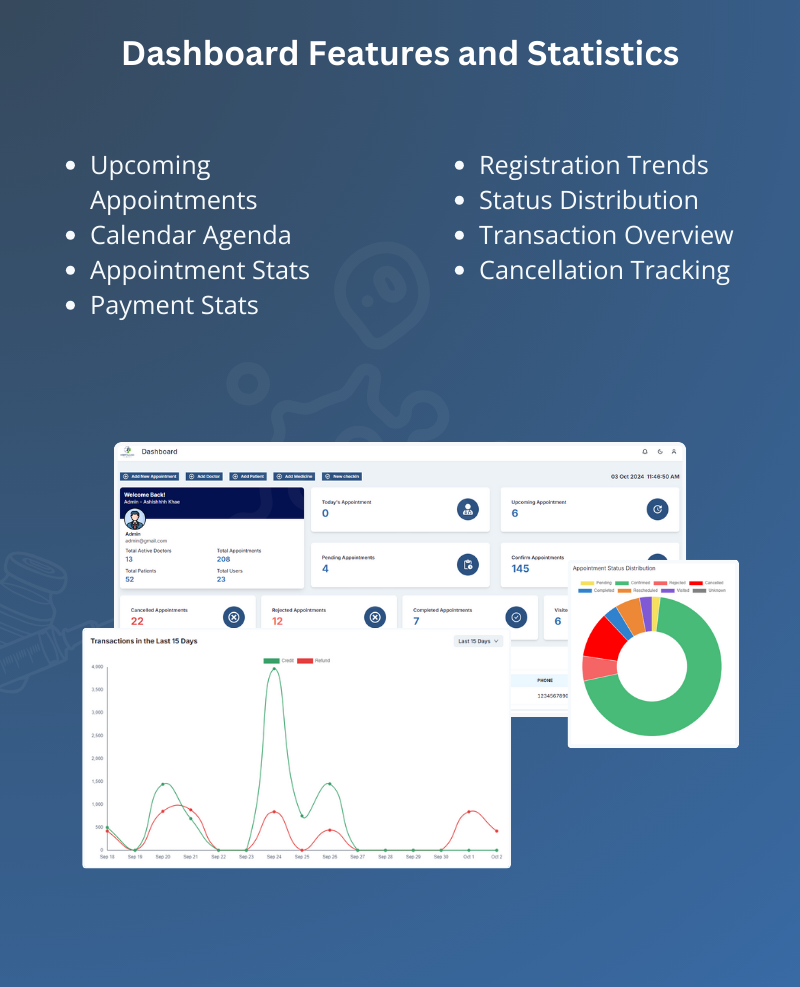
Medicare is not just a tool; it is a full-fledged clinic management system tailored for the future of healthcare. Whether you’re operating in one city or multiple, it enables you to scale with ease while maintaining consistency in care and operations.
By using Medicare, you eliminate paperwork, reduce patient wait times, and bring transparency into your services — all thanks to a smart, secure, and scalable clinic management solution. It’s time to elevate your healthcare business with this multi-functional, mobile-ready, and user-centric clinic management system.

Core Functionalities
Managing appointments is one of the core functionalities of
Medicare clinic management system. Once the doctors are set up, both the admin and patients
can generate appointments. Appointments can be managed by the
admin, front desk, and doctor, ensuring a smooth workflow across
all parties involved.
- Generate Appointment
- Appointment From Admin Panel
- Go to the Appointments section in the Admin Panel.
- Click on Add New.
-
Add a new patient or select an existing patient from the
list. -
Fill in the appointment details, including selecting the
doctor, appointment type, and appointment date and time and
other information. - Click Add Appointment.
- You can find the added appointment in appointment section.
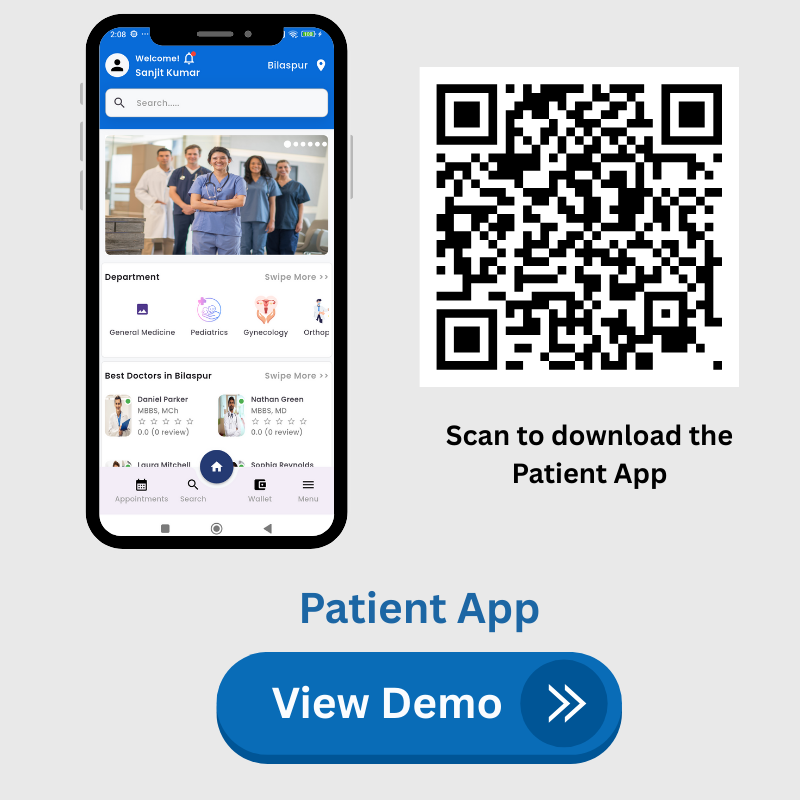
- Appointment From User App
- Click on the doctors or Go to the Department Page or the Search Page.
- Click on Book Now.
-
Select the appointment type and choose the date and time for
the appointment. -
Select an patient or click Add New Patient to enter a new
patient’s details. - Choose the payment option and confirm the booking.
- Appointment From web App
- Click on the Get Appointment button.
- Select the doctor for the appointment.
- Choose the date and time for the appointment.
- Select an existing patient or add a new patient.
- Choose the payment option (if applicable).
- Click Confirm Booking to finalize the appointment.
- Manage Appointment
- Update Patient Details
- Update Doctor
- Update Appointment Status
-
Confirmed – Initially, all appointments are
generated with the “Confirmed” status. This status can be
changed later based on further actions or updates. -
Pending – This status indicates that the
appointment is not yet confirmed. It can either be rejected
or rescheduled based on further actions. -
Visited – This status indicates that the
doctor has checked the patient and the appointment has been
completed successfully. Note that once an appointment is
updated to “Visited,” it cannot be reverted or changed to
another status. -
Completed – This status indicates that the
appointment was a video consultation and has been
successfully completed by the doctor. Note that once an
appointment is updated to “Completed,” it cannot be reverted
or changed to another status. -
Rescheduled – This status is used when the
appointment date or time is changed. The rescheduling
operation can only be performed through the Admin Panel. -
Rejected – This status indicates that the
appointment has been rejected. This action is taken through
the Admin. -
Cancelled – This status indicates that the
appointment has been canceled by the user. The cancellation
process begins when the user submits a cancellation request
from the User App (Edit Appointment page). The admin can
then view the request in the “Edit Appointment” page or the
“Cancellation Requests” page. If the admin approves the
request, the appointment status is updated to “Cancelled.” - Add/Update/Print Prescriptions
- Patient File
- Appointment Checkins
- Appointment Cancellation
- Appointment Calender
- Appointment Payment
- Join Video Call
- Transaction
-
All Transactions: Displays transaction IDs and detailed
records of all transactions. -
Invoice: Contains the invoice details associated with each
transaction. -
Payment: Shows the attached transaction ID along with the
invoice ID and other relevant details.
Appointments can be generated from the Admin Panel, Web App, and
Mobile App. Let’s understand how appointments can be generated
in each of these platforms.

Admin, doctors, and front desk staff can find the generated
appointments in the Appointment List, Dashboard, and Appointment
Calendar. From these sections, they can view and edit the
appointment details as needed.
From the “Edit Appointment” page, you can update the patient’s
details by clicking the link button associated with the
patient’s information. This button will navigate you to the
Patient Details page, where you can update the patient’s
information as needed.
You cannot update the doctor for an existing appointment. If a
change is required, you must reject the current appointment
and create a new one with the updated doctor details
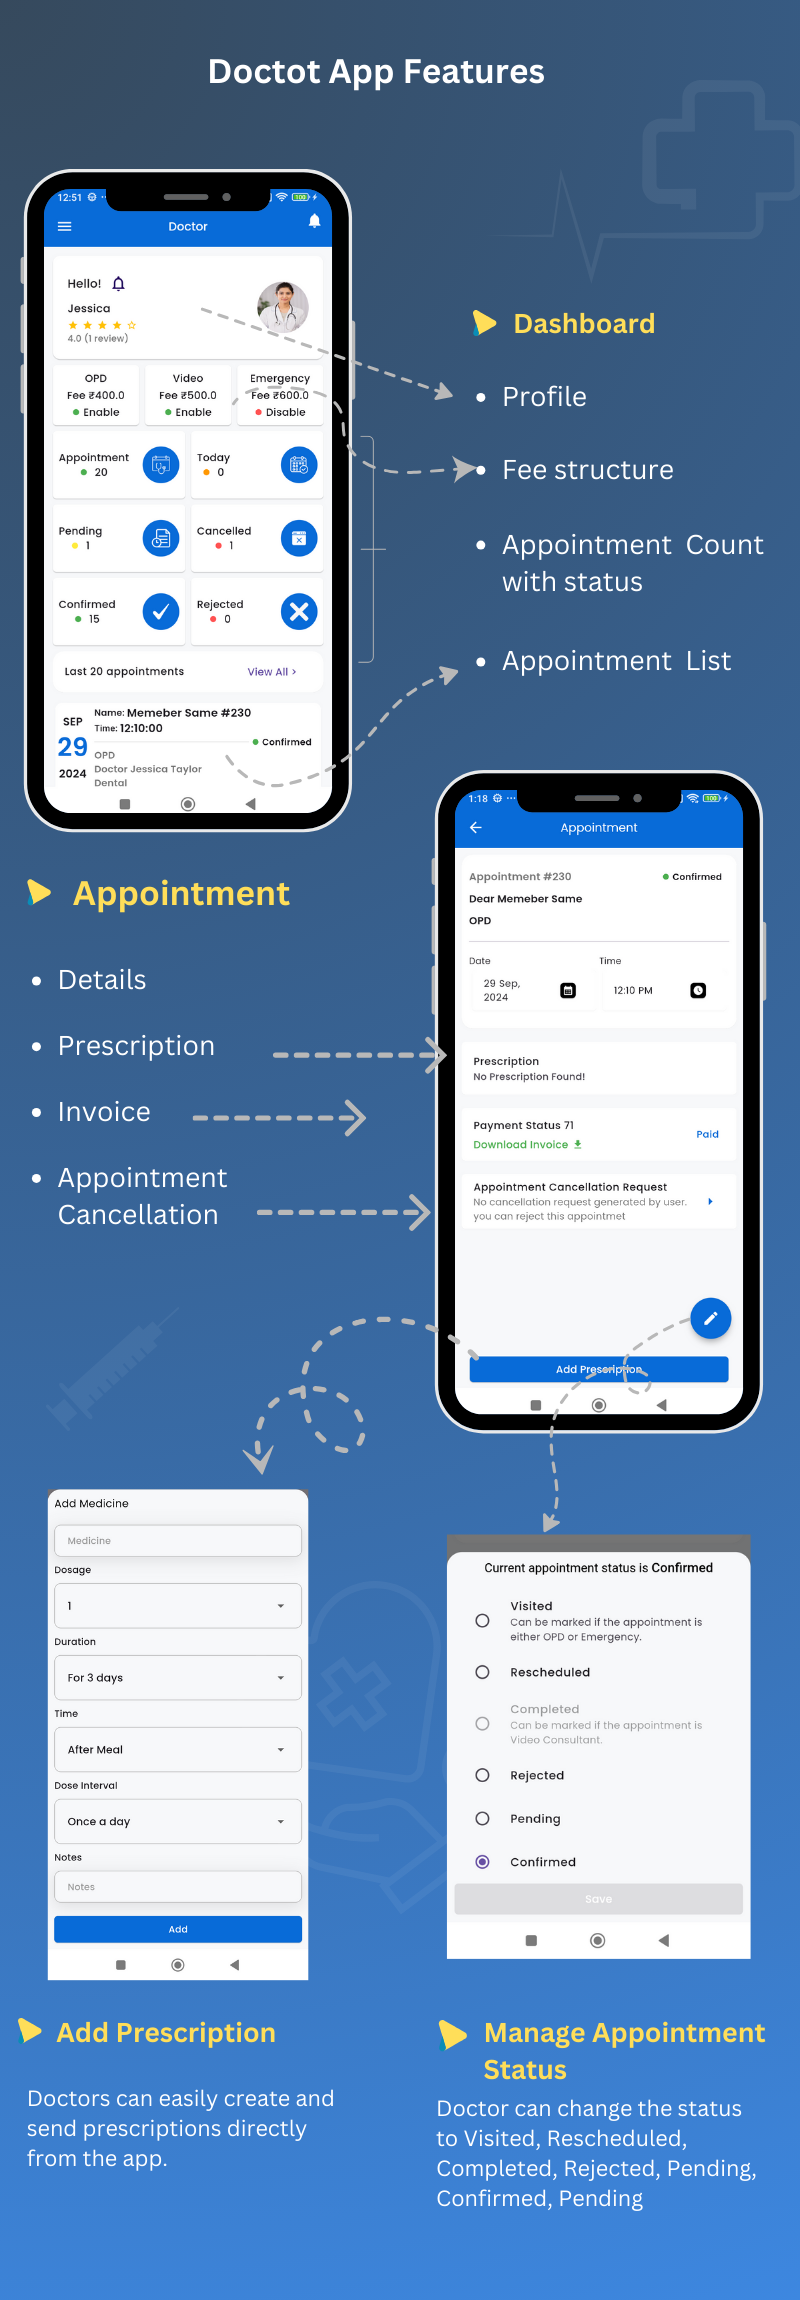
Our system supports a total of seven appointment statuses,
each representing a specific stage in the appointment process.
These statuses help track and manage appointments efficiently,
ensuring clear communication between admins, doctors, and
patients.
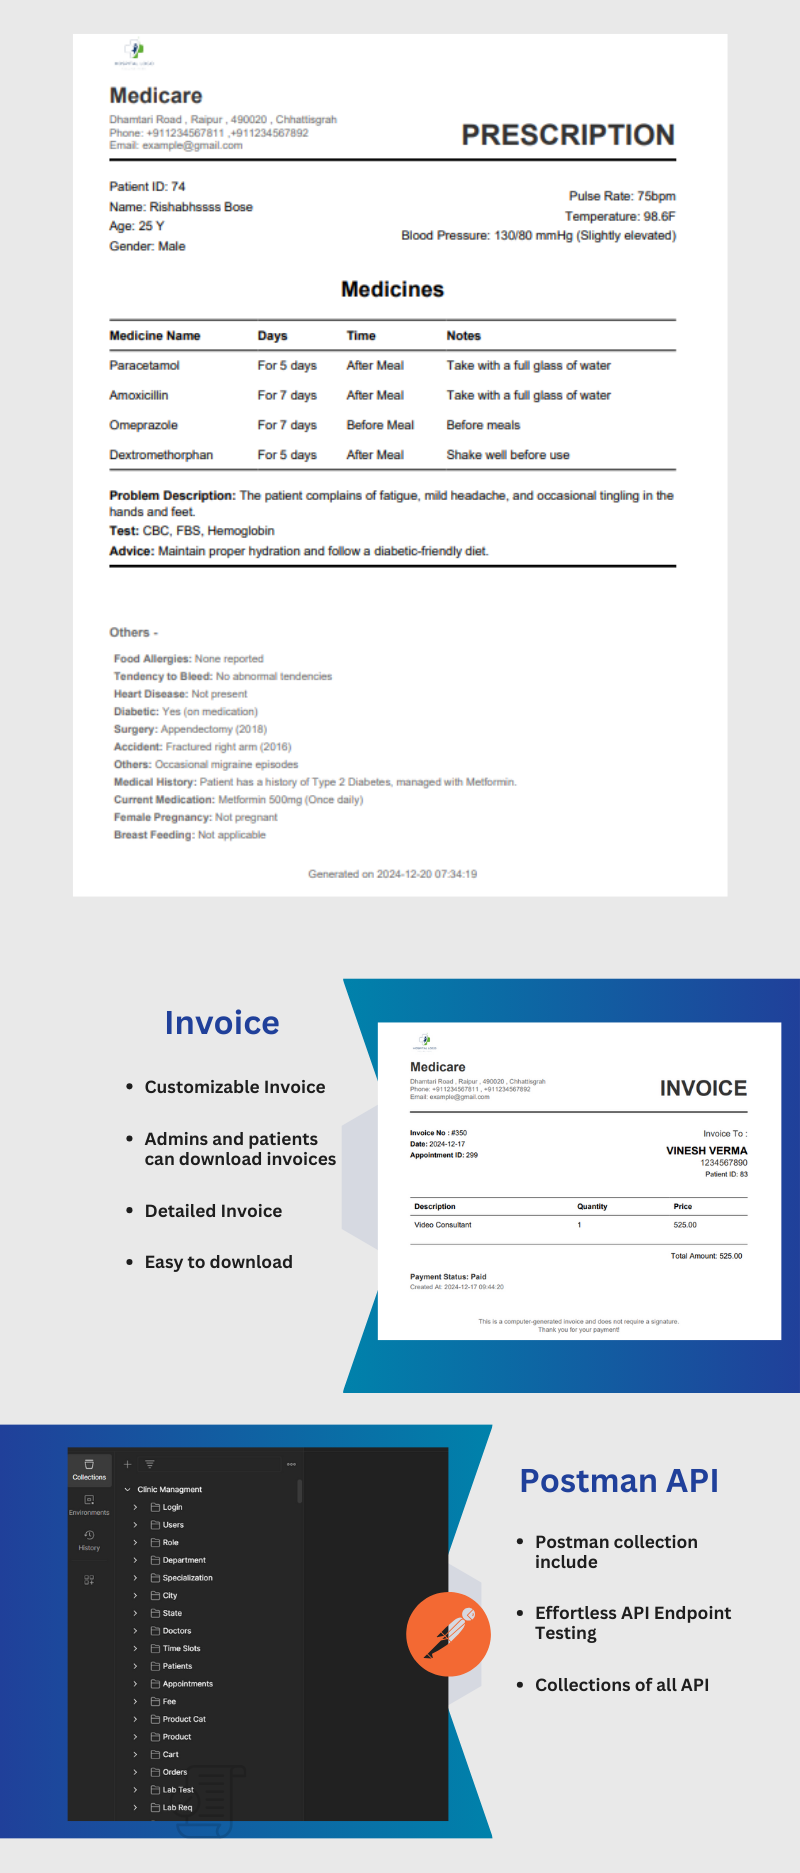
The prescription can be checked from the “Edit Appointment” page
or the “Prescription” page. You can add or update the
prescription directly from the “Edit Appointment” page by
entering the necessary details and saving the changes.
Remember, if you want to map all medicines, press the “New
Medicine” button or go to the “Medicine” page to add new
medicines. Once you’ve mapped all the medicines, there’s no need
to type them multiple times; you can simply select them from the
list.
Print Prescription –
Once you have added the prescription, you can easily print it
from the Prescription List. Simply click the “Print” button to
generate a printable version of the prescription.
The patient file can be checked and added from the “Edit
Appointment” page or the “Patient File” page. To add a new file,
go to the “Patient File” page and press the “Add New” button.
Fill out the required form and press “Add File” to save the
file. You can add, update and delete reports or any other files
related to the patient.
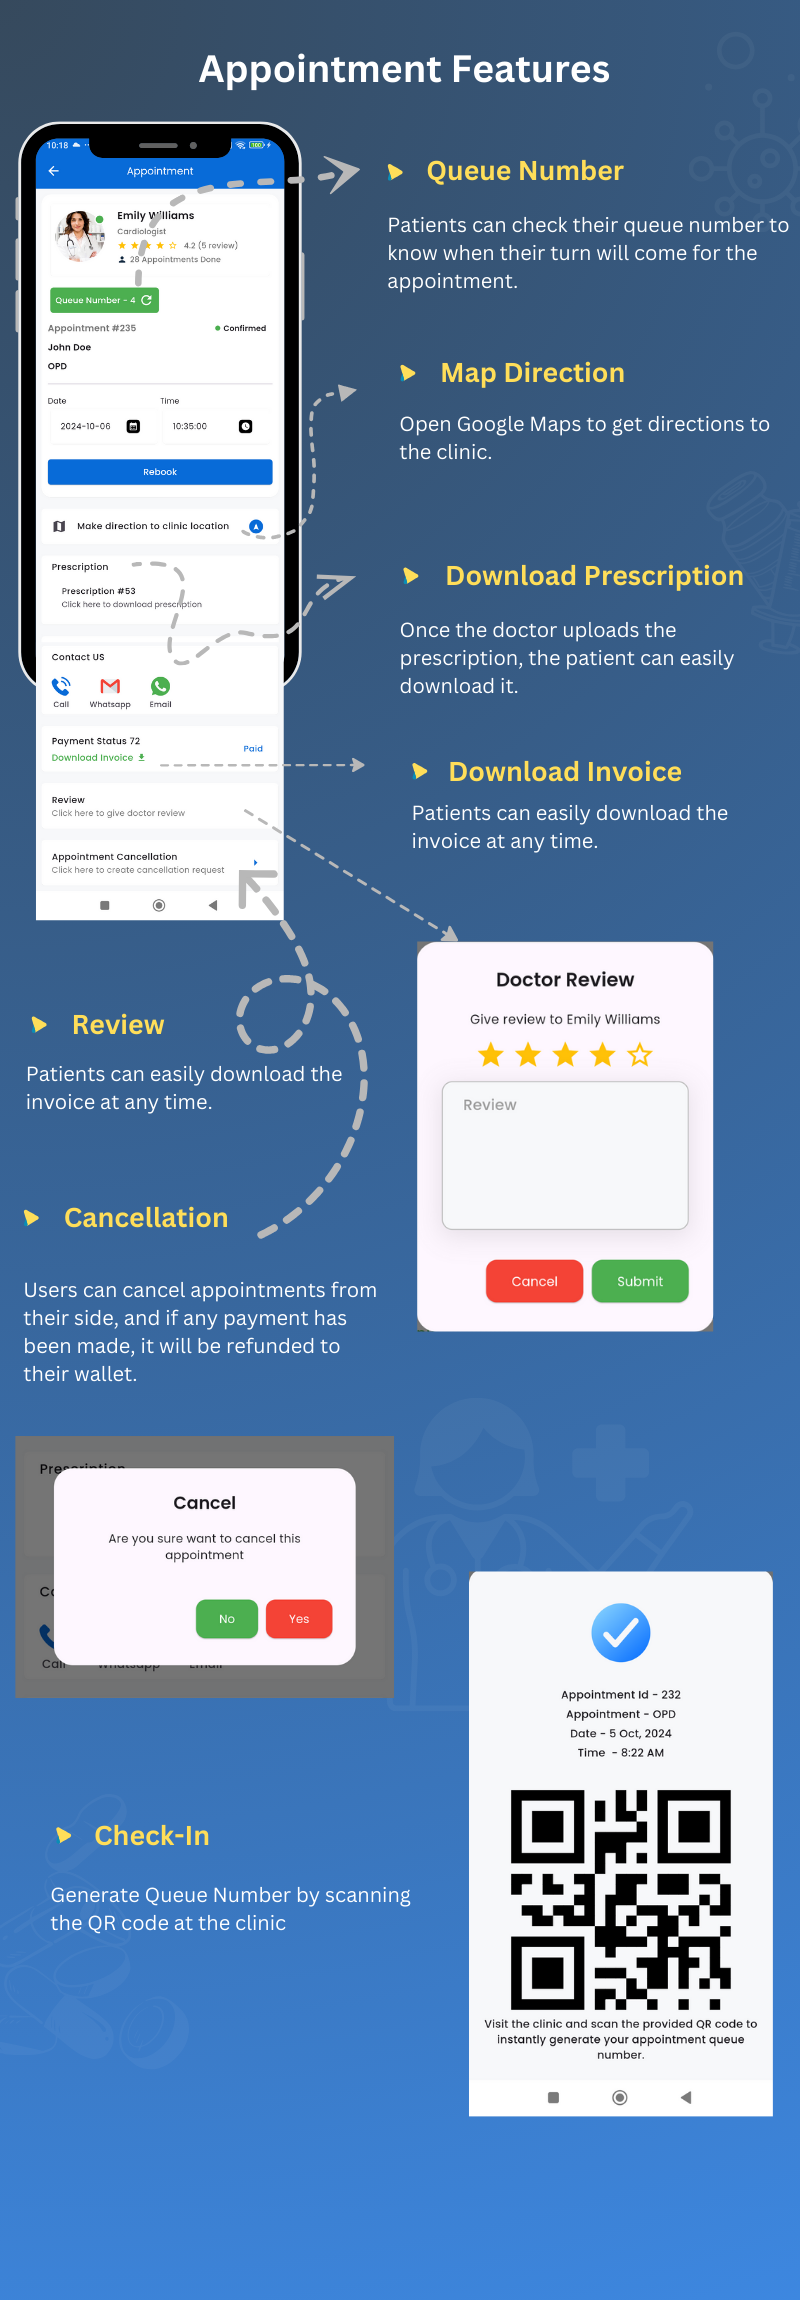
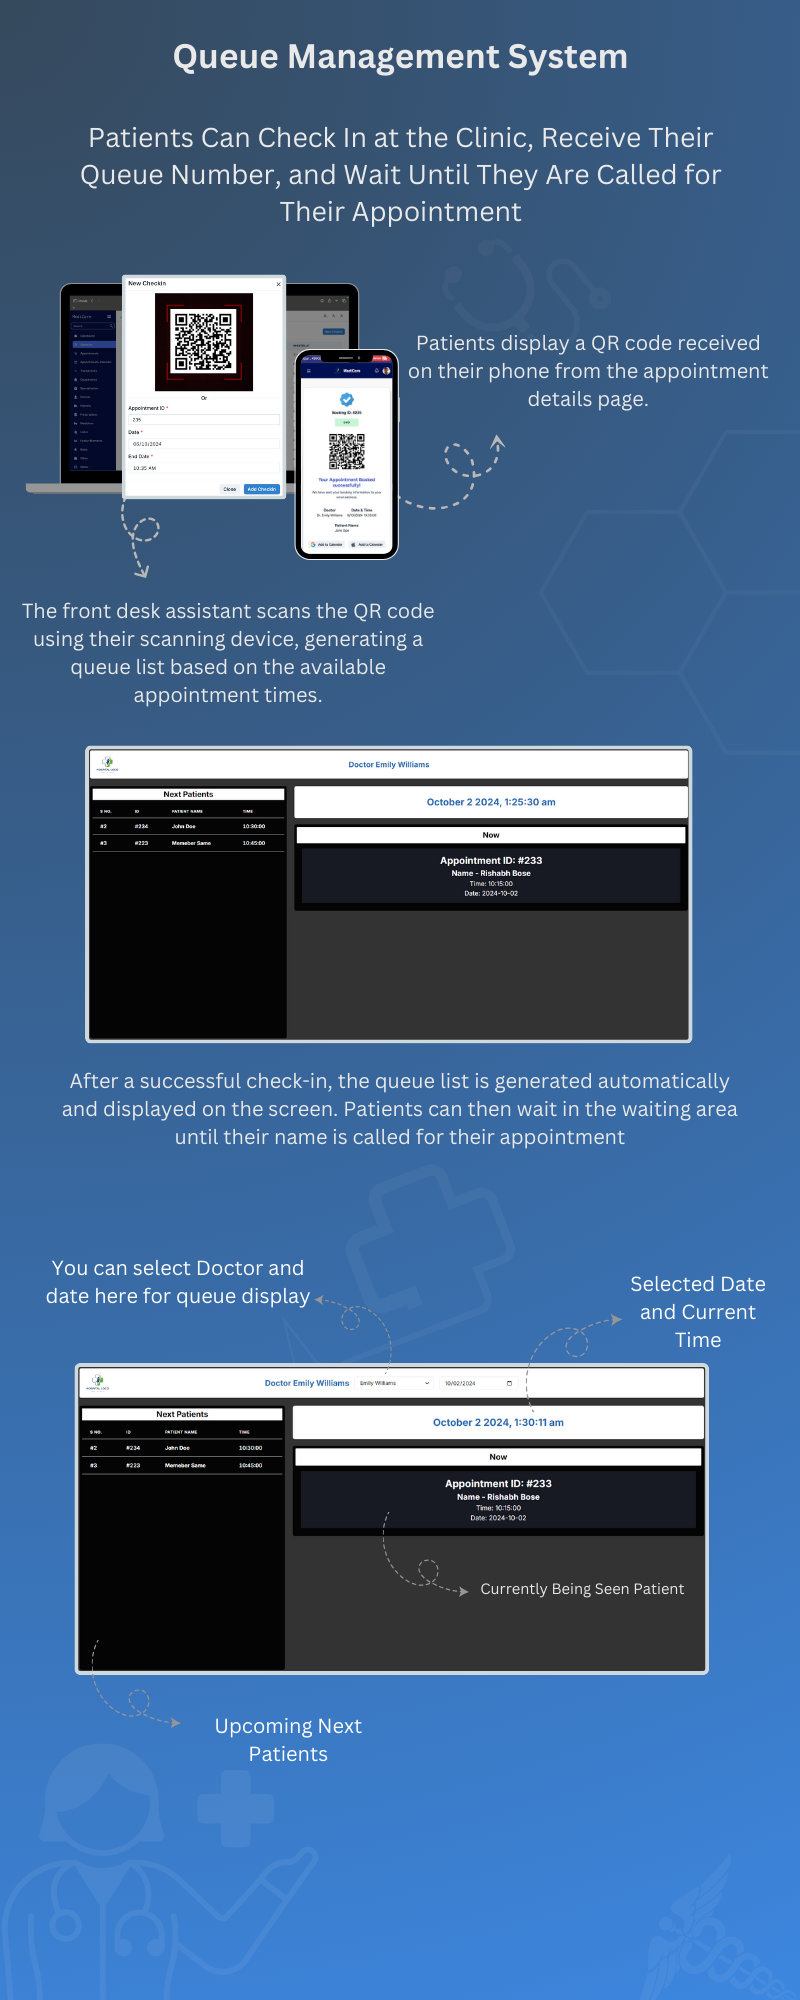
Appointment Check-in is an additional and exciting feature of
Medicare clinic management system. You can check in the patient and generate a queue
number, which will be displayed on the clinic screen. The user
can also view their queue number from the appointment details
page.
Once the patient arrives at your clinic, you can check in the
appointment from the Check-in page. To do so, press the
“Check-in” button, where you can fill out the check-in form or
scan the QR code. The QR code can be obtained from the user’s
phone on the Appointment Details page.
In the case of appointment cancellations or rejections, a refund
will be generated only for paid appointments. This applies when
the payment for the appointment was initiated by the user and
successfully captured.
From this page, you can view all appointments with their
scheduled times. The appointments are arranged in a calendar
view, making it easy for the admin to see appointments on a
daily basis. This layout helps in quickly identifying and
managing appointments.
In the Appointment Details page, you can view the appointment
invoice, transaction details, and payment methods. This allows
you to track the payment status and manage financial
transactions related to the appointment.
Before starting the video appointment, make sure you have
configured Zoom in the Admin Settings page.
For video calls, we are using Zoom. In the Appointment Details
page, find the meeting link field and click on the link button.
This will navigate you to the Zoom link, where you can wait for
the user to join the meeting.
Users can also join the meeting from the Appointment Details
page (User App) by clicking the “Video Call” button.
Remember, if you reject or reschedule the appointment, the
change will also be reflected in the Zoom panel. The appointment
will be deleted or rescheduled accordingly in Zoom as well.
On this page, you will find three tabs: All Transactions,
Payment, and Invoice. When a user completes a transaction, the
record is stored in the Transaction section.
Update V4.0.0 – 23 April 2026 – Subscription Model Update
1. Subscription Plans Module added
   - Super Admin and Clinic can create and manage subscription plans from the admin panel.
   - Plans are designed for patients to subscribe and avail clinic services.
   - Services can be added directly to a subscription plan, defining what the patient gets access to.
   - Plans can be configured with custom duration (weekly, monthly, yearly).
   - Each plan can have its own pricing, features, and usage limits.
   - Subscription Plan module can be enabled or disabled from the configuration settings, giving full control over the availability of the feature.
   - Super Admin and Clinic can activate, deactivate, or delete plans at any time.

2. Patient Plan Purchase added
   - Patients can browse and purchase subscription plans from the mobile app and website.
   - Payment is processed through the available payment gateways.
   - Purchased plan is instantly activated and available for use on clinic visits.
   - At the time of appointment booking, patients can choose to use their active subscription plan.
   - OPD Video Consultation and Emergency have been added as special service types within a plan.
   - If a patient's plan includes OPD Video or Emergency services, they can directly book those appointment types using the plan.

3. Patient Plan Tracking & Management added
   - Patients can view all available plans and their full details on the mobile app and website.
   - Purchased plan details are accessible including plan name, duration, and included services.
   - Patients can track remaining service limits and how many times each service has been used.
   - Remaining active days of the plan are clearly displayed.
   - Plan status (active, expired, exhausted) is visible at all times.
   - Full usage history of the plan is available for patient reference.

4. Subscription Billing & Invoicing added
   - Auto-generated invoices for each subscription payment.
   - Billing history accessible from the admin panel and patient profile.
   - Clinic can apply a patient's active subscription plan at the time of appointment booking.
   - Clinic can generate an invoice using the patient's plan to cover any included service.
   - Services availed through the plan are automatically reflected in the invoice.

5. UI Improvements
   - Dashboard UI has been redesigned and improved for Super Admin, Clinic, Doctor, and Pathology panels.
   - Drawer navigation UI in the patient mobile application has been updated with a fresh new look.

6. Automated Reminder & Notification System added
   - Patients receive an automatic reminder notification on the same day of their appointment.
   - Patients receive an automatic reminder notification 1 hour before their scheduled appointment time.
   - Doctors receive an automated daily summary notification with their total appointment count for the day.
   - Admin receives an automated daily summary of total appointments scheduled for the day.
   - Patients with lab bookings receive an automatic reminder notification on the same day of their lab appointment.
   - Pathology labs receive an automated daily summary notification with their total lab booking count for the day.
   - Admin receives an automated daily summary of total lab appointments scheduled for the day.
   - Subscriptions are automatically expired when the end date has passed, and patients and admin are notified instantly upon expiry.
Update V3.2.0 – 07 February 2026
- Added AI chat-based assistant for smart doctor recommendation
- Enhanced appointment booking experience with AI suggestions
- Minor UI improvements
Update V3.1.0 – 30 January 2026 (Feature & Performance Update)
1. Dynamic Multi-Language System added
   - Super Admin can add and manage multiple languages from the admin panel.
   - All system texts update dynamically based on the selected language.
   - Now all controls are managed from the admin panel.

2. Advanced Multi-Currency Management added
   - Super Admin can add and manage currencies from the admin panel.
   - Admin can configure the currency symbol (₹, $, €, etc.).
   - Currency symbol position (before or after the amount) can be controlled.
   - Decimal precision for currency values can be configured.
   - Ensures accurate pricing display across regions.

3. Multiple Payment Gateway Integration added
   - Payment gateway managed from the backend; no SDK required.
   - Paystack, Razorpay, and Stripe gateways added.
   - Improves payment flexibility and success rate for patients.

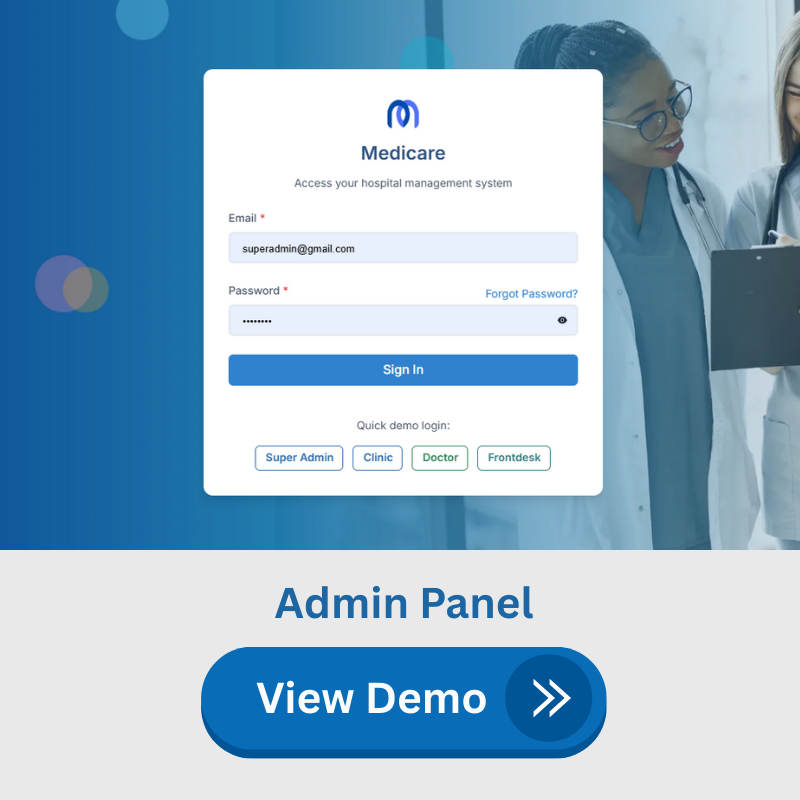
4. Brand New Login Page UI
   - Redesigned modern login interface.
   - Improved user experience with a cleaner layout.
   - Faster loading and optimized performance.

5. Optimized Queue Display System
   - Queue screen performance significantly improved.
   - Smoother real-time updates for patient flow.
   - Enhanced visibility of the current token and upcoming patients.

6. Live Patient Calling Feature added
   - Staff can call patients live directly from the system.
   - Reduces confusion and improves clinic workflow.
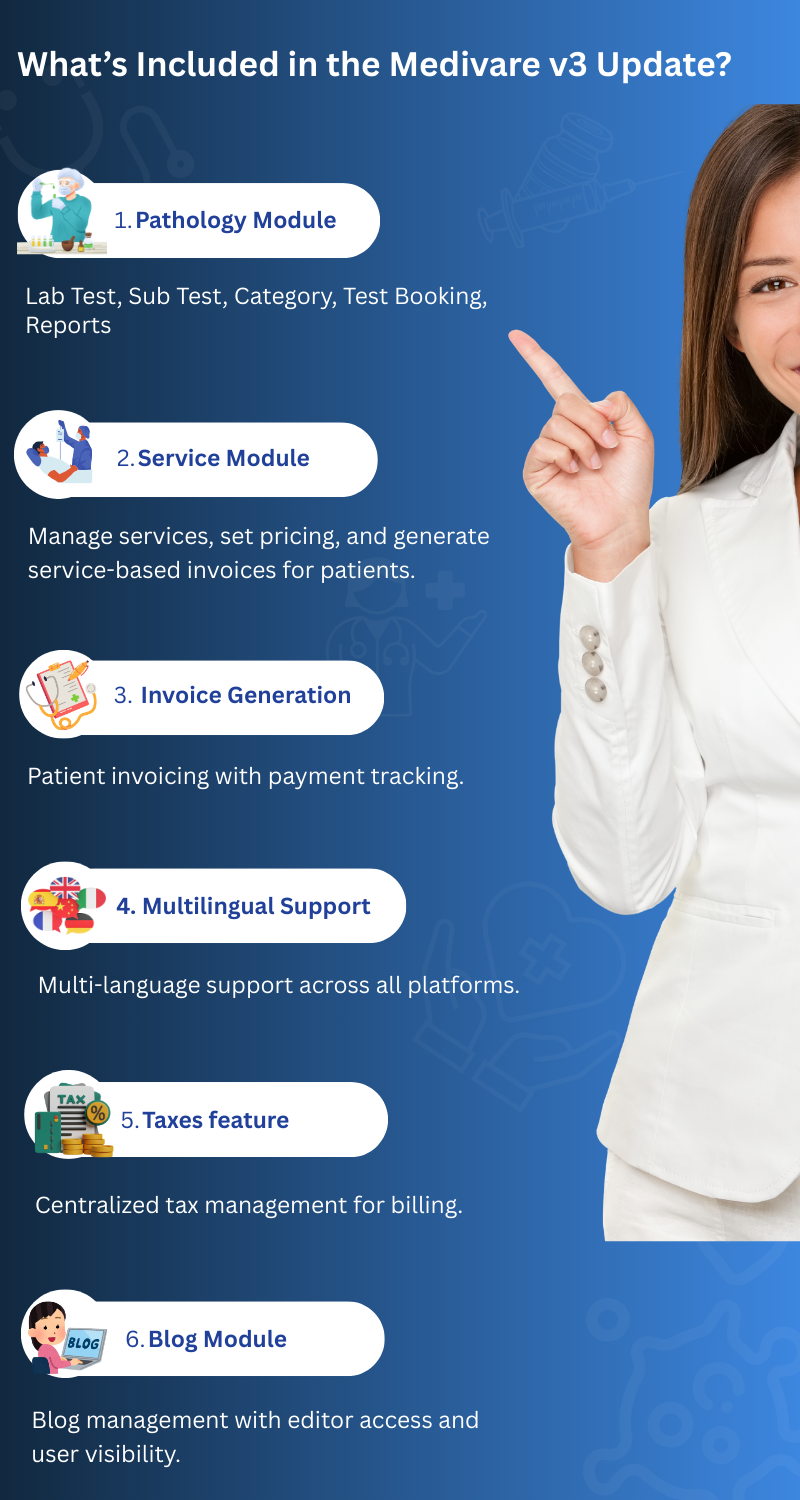
1. Pathology Module added
   - Super Admin can add and manage multiple pathology labs.
   - Pathology (Lab Admin) can manage lab tests, sub-tests, and test categories.
   - Lab admins can create test bookings and generate/upload lab report files from the admin panel.
   - Labs can manage their own patients, transactions, and invoices.
   - Users can search pathology labs on mobile apps and the website and book lab tests online.
   - Lab Review & Testimonial feature added.
   - Lab Coupon feature added.

2. Service Module added
   - Clinics can add and manage the services they provide (e.g. consultation, procedures, examinations, etc.).
   - Each service can have its own pricing and details.
   - Clinics can generate service-based invoices and billing for patients.
   - Service invoices can be managed and tracked from the admin panel.

3. Manual Invoice Generation added
   - Clinics can create and manage invoices manually.
   - Clinics can add new invoices for patients as needed.
   - Unpaid invoices can be deleted or updated.
   - Invoices can be marked as paid once payment is received.
4. Multilingual Support added
   - Multilingual support is available in the admin panel, web application, and mobile apps.

5. Taxes feature added
   - Super Admin can add and manage taxes.
   - Taxes can be configured as included or excluded.
   - The same tax configuration is used by clinics and other users while generating invoices.

6. Blog Module added
   - Super Admin can create, update, and manage blog posts.
   - Super Admin can assign users to edit and manage blogs.
   - Assigned users can add or update blog content from the admin panel.
   - Users can view blogs on the website and mobile apps.

7. API Security issues fixed
   - Direct access to APIs via URL has been restricted.
   - Security features have been implemented to protect API endpoints.
   - APIs can now be accessed only through authorized requests.

8. Patient MRN added
   - A unique MRN (Medical Record Number) has been introduced for each patient.
   - This MRN is used to link clinic patients with laboratory records.
   - Labs can add patients to their system using the MRN number.
   - Labs can view patient prescription records using the MRN.
   - Test bookings can be generated based on the written prescription records.
   - Clinic patients can view lab records generated by any laboratory linked through their MRN.

9. Updated all Flutter dependencies to their latest stable versions, enhancing performance and stability.

10. Enhance admin panel, web panel and doctor UI/UX.
Update V2.0.0 – 22 April 2025 (Major Update)
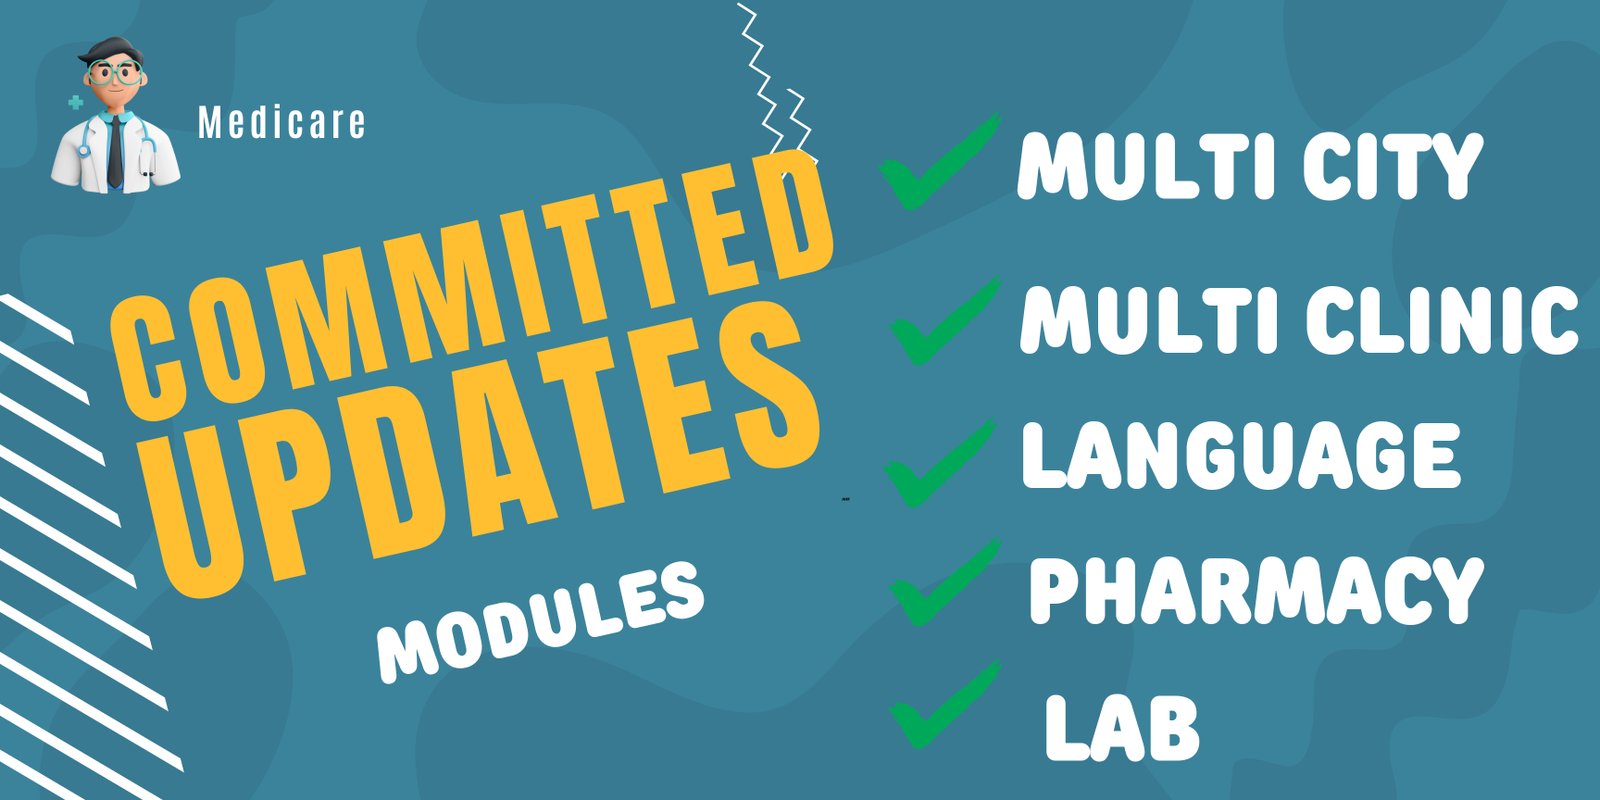
    1. Multi-City Functionality Added. Added support to run your system across different cities.
    2. Multi-Clinic Functionality Added. Now you can manage multiple clinics under one system.
    3. Updated all Flutter dependencies to their latest stable versions, enhancing performance and stability.
    4. Fixed bugs in the admin panel.
    5. Resolved issues in the web app affecting different sections.
Update V1.4.0 – 12 March 2025
    1. Updated all Flutter dependencies to their latest stable versions, enhancing performance and stability.
    2. Fixed API installation error on activation.
Update V1.3.0 - 28 February 20251. Updated all Flutter dependencies to their latest stable versions, enhancing performance and stability. 2. Fixed Zoom meeting creation error. 3. Fixed bugs in the admin panel. 4. Resolved issues in the web app affecting different sections. 5. Added written prescription support in the doctor app.Update V1.2.0 - 16 February 20251. Updated all flutter dependencies to their latest stable versions, enhancing performance and stability. 2. Login button bug fix in user mobile app. 3. Fixed bugs in admin panel. 4. Resolved issues in the web app affecting different sections. 5. Fixed bugs in the Razorpay payment controller.Update V1.1.0 - 28 January 20251. Migrated the application to Flutter 3.27.x, ensuring compatibility with the latest framework updates. 2. Updated all dependencies to their latest stable versions, enhancing performance and stability.Hospital & Clinic Management System with AI Chat Doctor Recommendation & Appointment Booking is software for healthcare providers to manage daily clinic and hospital operations. It can store patient records, organize doctor schedules, handle appointments, support billing, and track basic administrative information. Its chat feature asks patients about their needs and suggests suitable doctors or departments based on the information provided. Patients can then request or book appointments online. It is intended for hospitals, clinics, medical practices, front-desk staff, doctors, and patients.